
UrbanAna Quick Start: Getting Started with Urban Design Software
Quickly start with UrbanAna. Learn to draw streets, create blocks, generate buildings, and analyze metrics efficiently with real-time updates.
Knowledge Base
Step 1 – Start UrbanAna
Once UrbanAna is installed, you can start it in two ways:
1. Click the blue icon in the UrbanAna Toolbar that appears after installation (Figure 1).
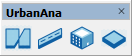
UrbanAna Toolbar – Quick access to start the urban design plugin
💡 *If toolbar is not visible, you can open it via SketchUp menu View → Toolbars → UrbanAna.*
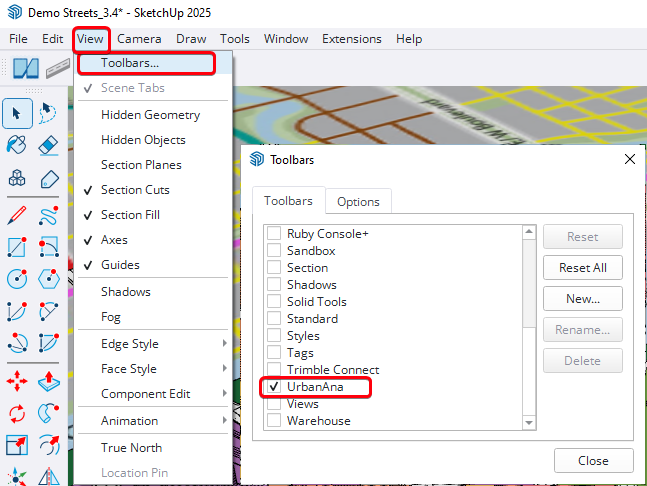
Steps to show UrbanAna toolbar through SketchUp View menu
2. Navigate through SketchUp menu: Tools → UrbanAna → Start UrbanAna (Figure 3.02).
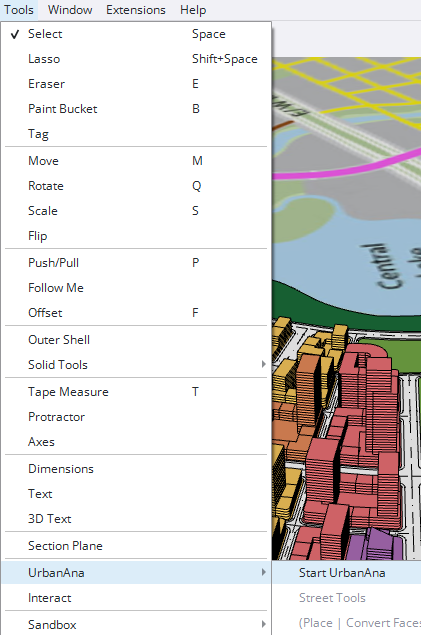
Starting UrbanAna from SketchUp Tools menu
Step 2 – Start UrbanAna model and setting the unit
After initialization, access Settings to configure Language and Units (meters or feet).
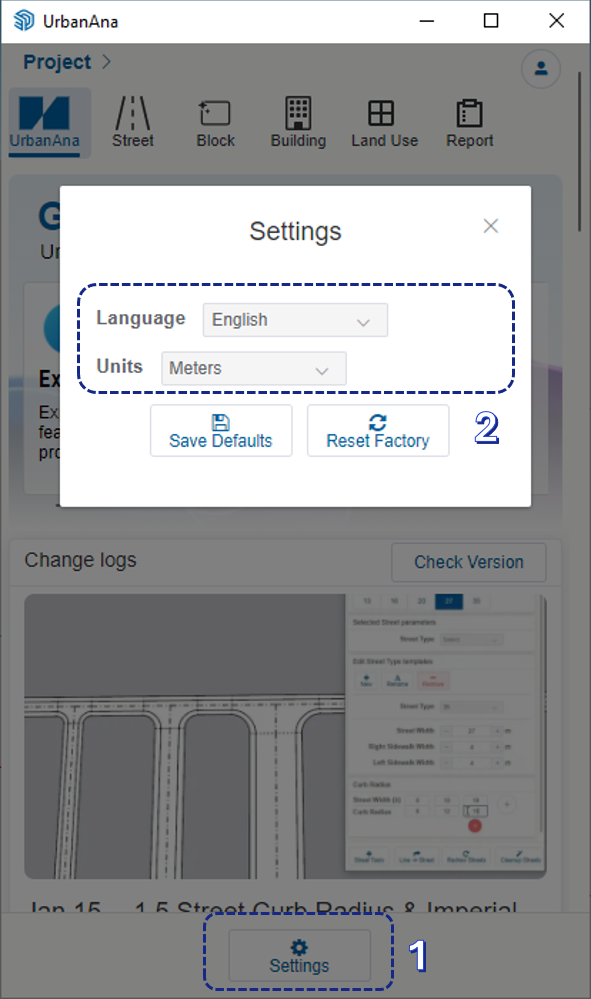
Setting up language preferences and measurement units in UrbanAna
Step 3 – Draw Streets
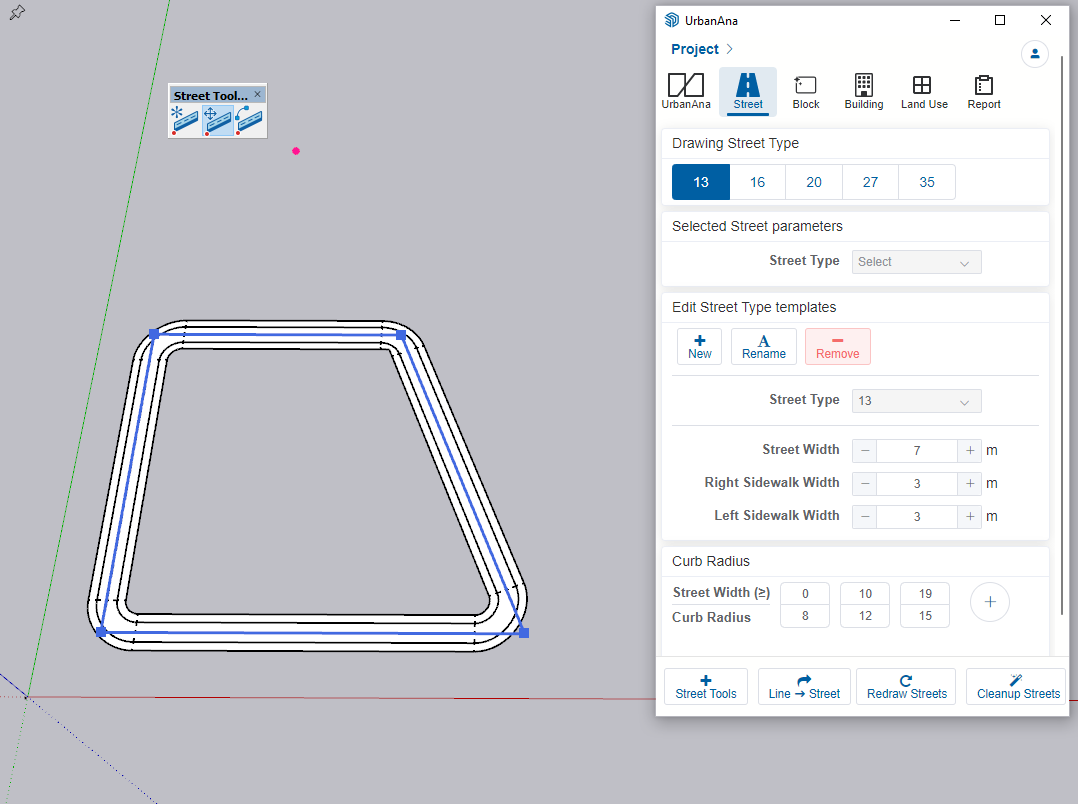
Street drawing tools and controls for urban planning
Use the “Street Tools” button in the toolbar to draw streets. Basic controls:
- Click in the viewport to start drawing
- Continue clicking to add street segments
- Hold and drag to create curved streets
- Alt key for Curve tool
- Ctrl key to move street nodes and segments
For detailed information about all street features and tools, see 5.3 Street.
Step 4 – Create Block
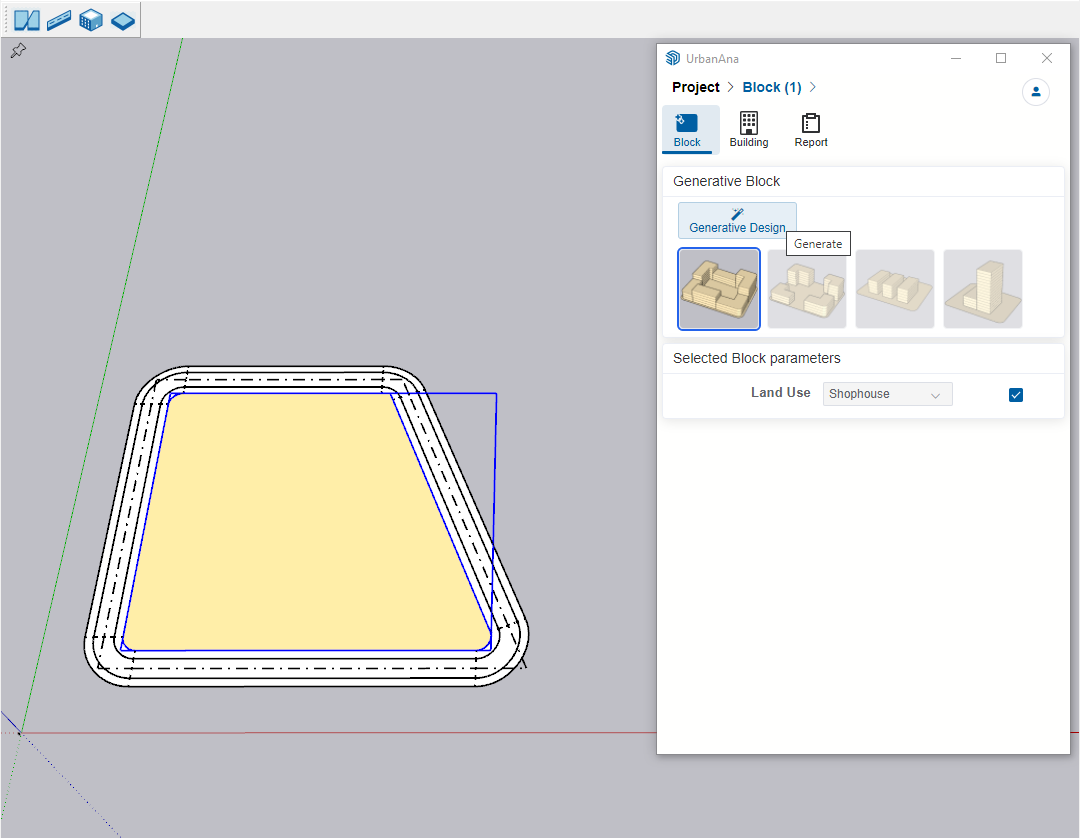
Creating urban blocks from street loop
Click the “Block Tools” button in toolbar to create block formed by the closed street loop.
In UrbanAna, Blocks are created in two ways:
- Automatic Block Creation: Click Block Tools without selecting faces to analyze the street network and create blocks from closed loops intersecting streets.
- Manual Block Creation: Select faces and click Block Tools to convert them into blocks.
For more information about Block tools, see 5.4 Block.
Step 5 – Generate Buildings
Generating buildings automatically within defined blocks
Use the “Generate Buildings” button to create buildings within a block using default parameters.
For more information about Block Generate Buildings, see 5.4 Block.
💡 Tip: You can Pin urban metrics in the Report tab for quick, real-time access in the SketchUp viewport.
Step 6 – Create/ Place custom Buildings, Edit Buildings
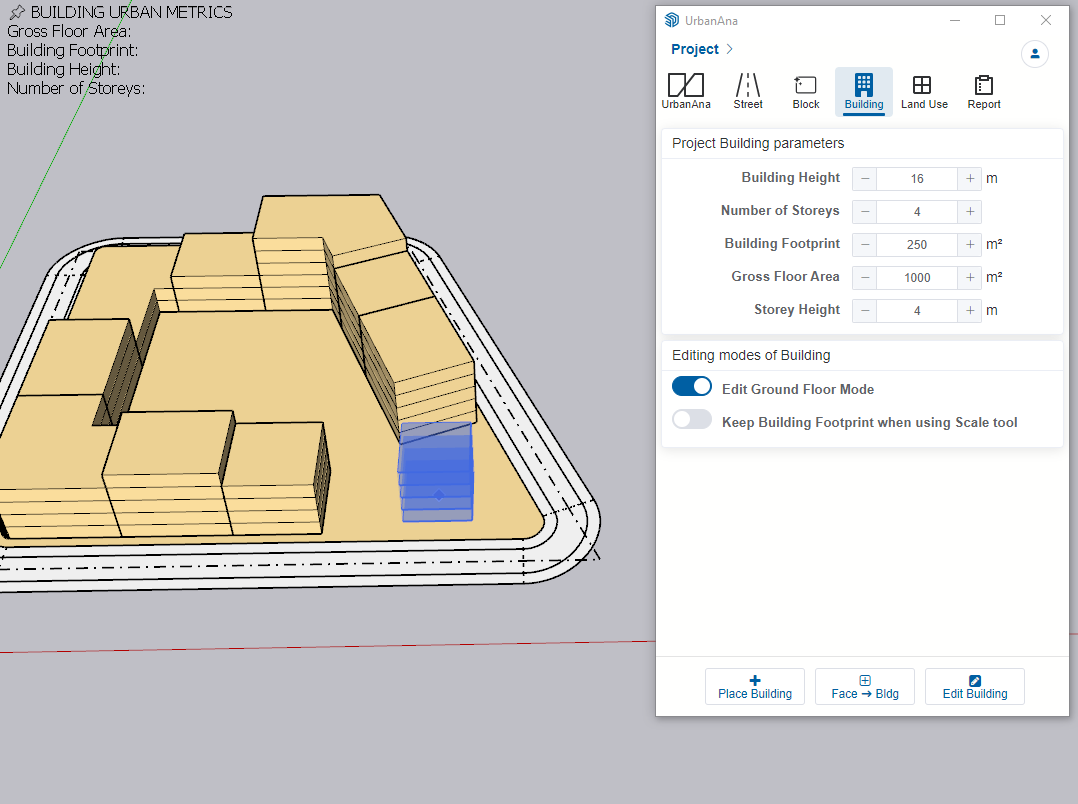
Tools for creating and modifying buildings in urban design
You can work with buildings in three ways:
- Place a new building: Click “Building Tools” without selection to place a building using default parameters.
- Create Buildings from Faces: Select faces before clicking Building Tools to convert them into buildings.
- Edit Buildings: Select building before clicking Building Tools to modify its ground floor shape.
For more information about Buildings, see 5.5 Building.
Step 7 – Changing Parameters

Customizing building parameters for urban design optimization
Access the Parameters panel to modify building parameters like land use, height, building footprint,… to meet your design requirements. Parameters can be adjusted at the Project, Block, or Building level to achieve your desired urban form and density targets.
For more information about Land use and its calculation, see 5.6 Land Use.
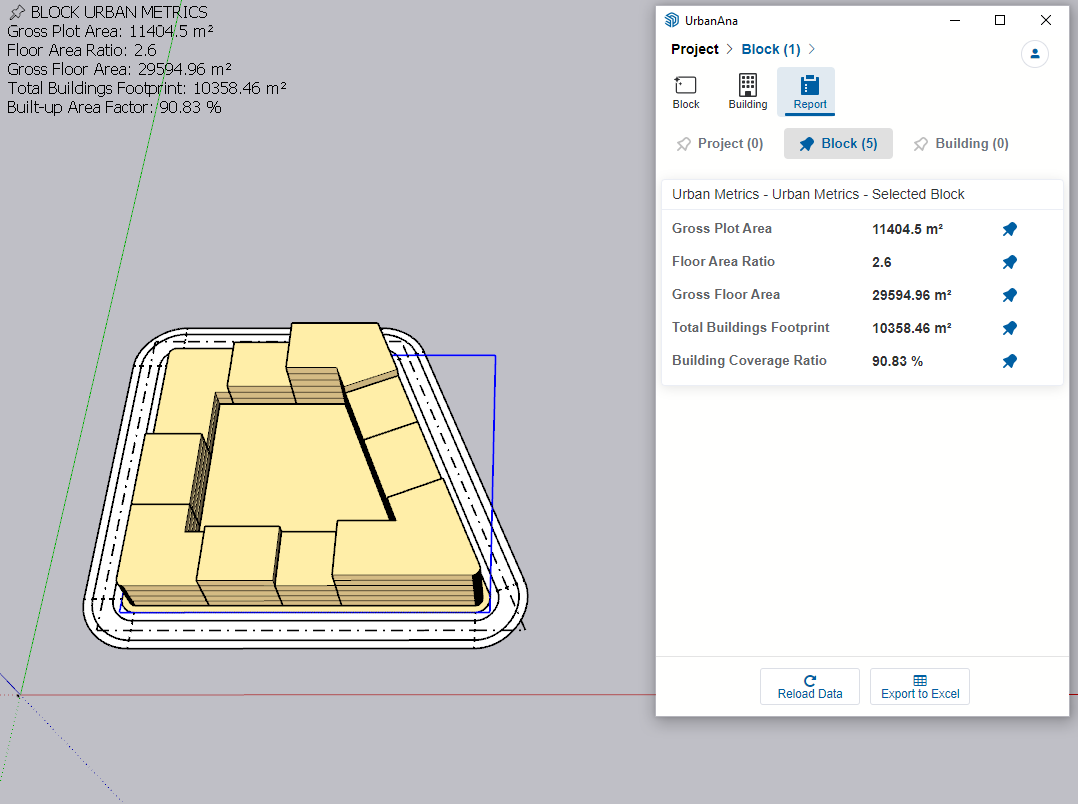
Step 8 – Check the Report
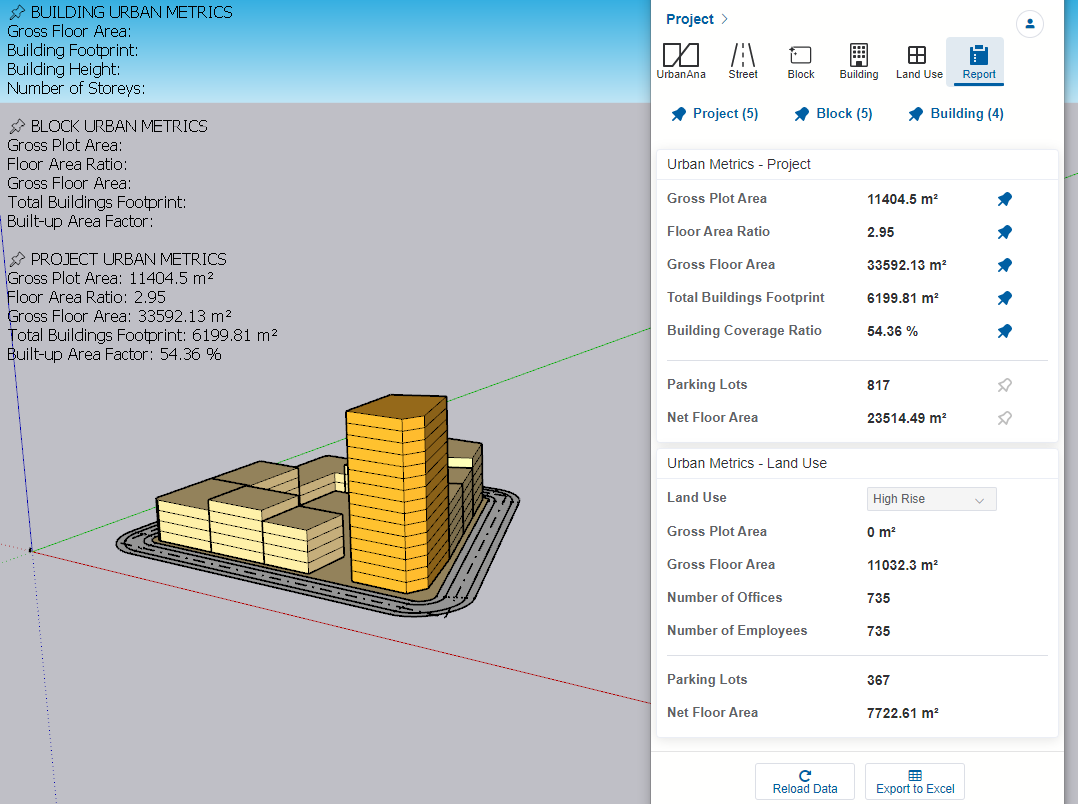
Comprehensive urban planning metrics and analysis report
Access the Report tab in the Parameters panel to view comprehensive metrics for your project. The report provides real-time calculations of key urban planning metrics including:
- Gross Floor Area (GFA)
- Floor Area Ratio (FAR)
- Building Coverage Ratio (BCR)
- Required Parking Spaces
- Population Statistics
The report updates automatically as you make changes to your model, allowing you to instantly see how design decisions impact important urban metrics. You can also export these reports for documentation purposes.
For detailed information about urban report metrics and features, see 5.7 Report.