
Designing Streets with UrbanAna: Tools and Techniques
Master street design in UrbanAna. Use tools to draw, edit, and curve streets, customize parameters, and optimize networks with additional tools like Line to Street, Redraw, and Cleanup.
Knowledge Base
Street in UrbanAna allows users to draw, define and customize street types and their parameters.
Street Tools (Toolbar)
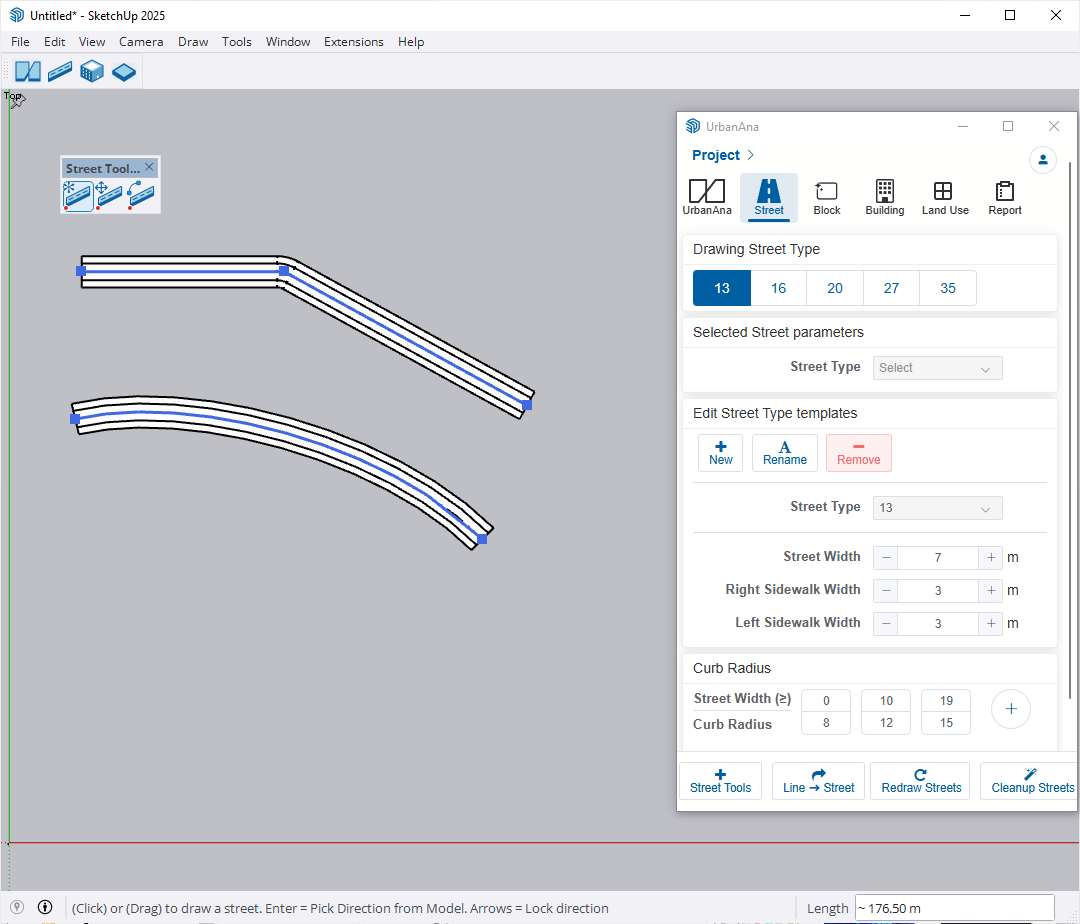
Street tools toolbar showing Draw Street, Edit Street and Curve Street tools in UrbanAna
Draw Street Tool
The Draw Street Tool allows you to create streets by clicking points in the viewport, similar to using a pen tool in Photoshop.
- Click to place points and create straight street segments. Continue clicking to add more segments.
- Drag (Hold click and drag) to create curved streets.
- Click mid segment will add street node.
- Hold Shift + Click on a street node to remove it (only for nodes between endpoints)
- Press Enter while hovering over an existing street segment’s centerline to align your drawing direction with that segment.
- Use Arrow keys to control drawing direction:
- Left/Right arrows lock drawing to X/Y axis respectively
- Up/Down arrows remove any directional locks
- Tab to toggle Protractor.
When using the Draw Street Tool, your cursor will automatically snap to existing streets and Guide lines. Guide lines can be created using SketchUp’s Tape Measure Tool to help with precise street placement and alignment. You can also enter a precise distance value in the Value Control Box (VCB) to draw the segment by that length.
Edit Street Tool
The Edit Street Tool (Ctrl to switch to/ Hold Ctrl for temporary) lets you move existing streets. When hovering over a street node or segment, you can click or drag to move node/ segment of street to a new position. You can also enter a precise distance value in the Value Control Box (VCB) to move the selected node or segment by that distance.
Curve Street Tool
The Curve Street Tool (Alt to switch to/ Hold Alt for temporary) enables you to create smooth curved streets.
- Click on segment to show curve handle.
- Drag on segment to curve the street segment.
- Click on node to make it corner (remove curve handles).
- Drag on a node to make it smooth (creating curve handles that are tangent to the street centerline).
Street parameters
The Project > Street tab allows users to define and customize street types and their parameters
Drawing Street Type
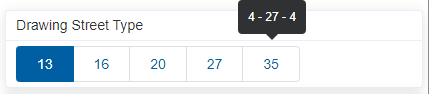
UrbanAna’s street type selector showing various street width options
- Select from predefined street types (e.g., 13, 16, 20, 27, 35 meters) before drawing in viewport.
- Hover over a street type button to see a tooltip showing the street’s dimensions:
- Left sidewalk width
- Street width
- Right sidewalk width
Selected Street Parameters
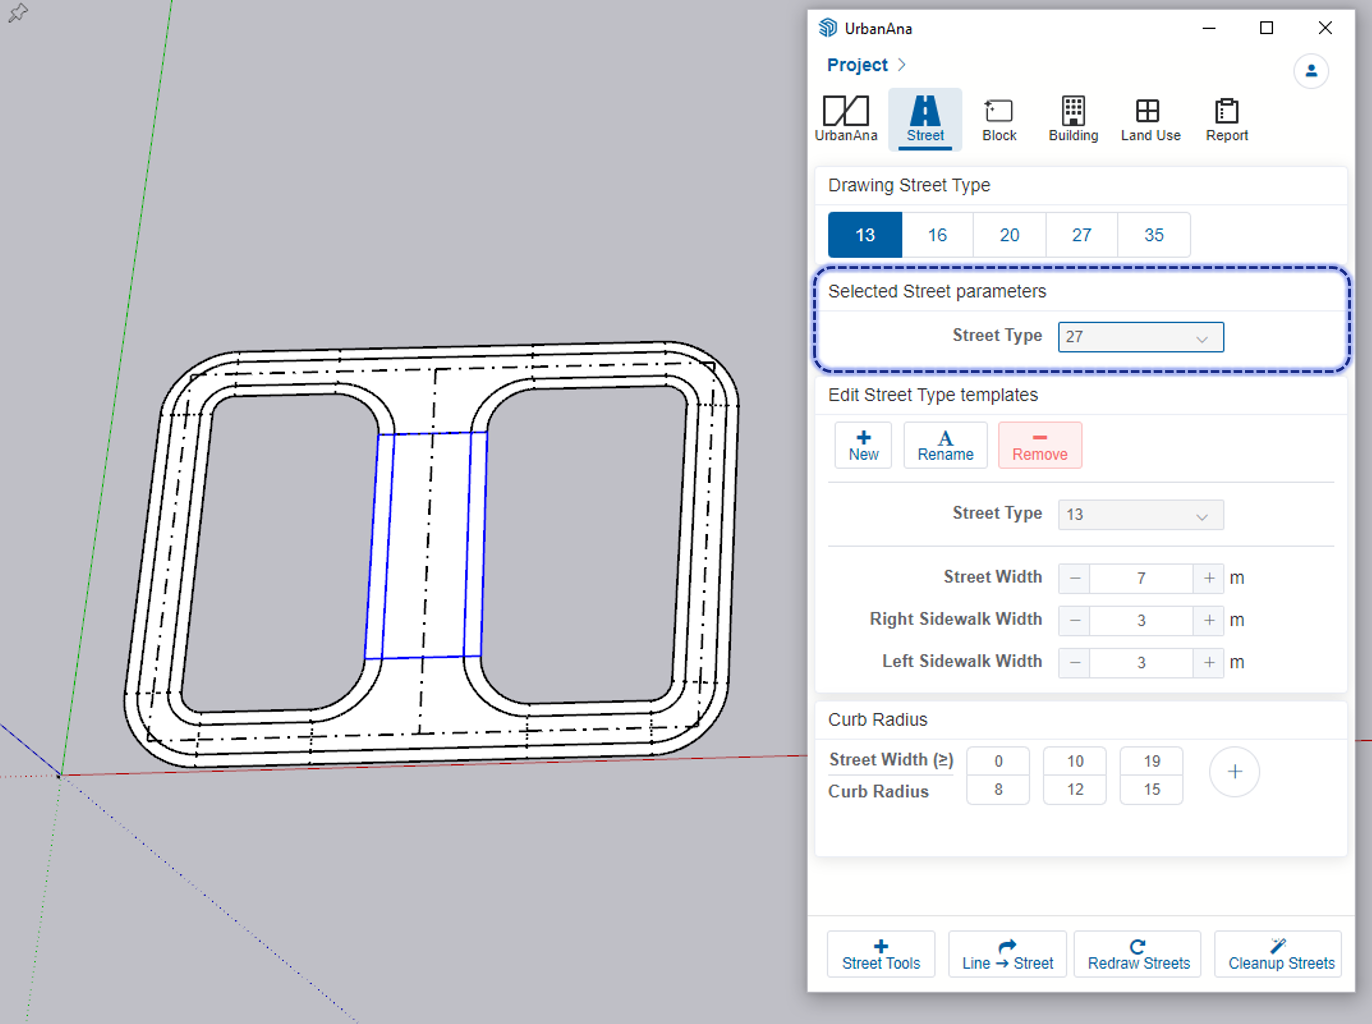
Street parameter interface for adjusting selected street
Street Type: Select one or multiple street segments (by selecting their center lines or segment shapes) to change their street types using the dropdown menu.
Edit Street Type Templates
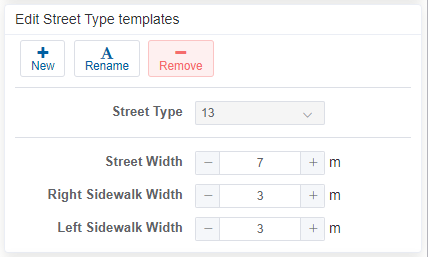
Street type template interface for customizing street profiles
New: Creates a new street type by duplicating the parameters of the currently selected street type. The parameters of the newly created street type can then be modified independently.
Rename: Allows you to modify the name of selected street type.
Remove: Deletes the currently selected street type from the project. Any objects that were assigned this street type will automatically be reassigned to the current Drawing Street Type.
Adjust street type parameters:
- Street Type: The dropdown lists all Street Types in the current model. To change parameters of a specific Street Type, select it here. Any changes made to street parameters will automatically update and redraw all affected street segments in the viewport in real-time, ensuring your model always reflects the current settings.
- Street Width: Set the width of the street in meters.
- Right Sidewalk Width: Define the width of the right sidewalk.
- Left Sidewalk Width: Define the width of the left sidewalk. The left and right sides of the street are determined by the direction you draw the street centerline.
Curb Radius

Interface for setting up street width and curb radius pairs
Street Width/Curb Radius Pairs: Define pairs of street widths and their corresponding curb radius that act as breakpoints for determining intersection curb radius.
- The pairs are automatically sorted by street width
- At intersections, the curb radius is determined by the street with largest width.
- Example: If a 5m wide street intersects with a 10m wide street, and the 10m width is paired with a 12m radius, the intersection will use a 12m curb radius
- Managing Pairs:
- To remove a pair: Hover over the pair and click the X button
- To add a new pair: Click the + button and enter the street width and curb radius values
Tools Panel (Additional Street Tools)
- Street Tools: Access various tools for street design: Draw Street Tool, Move Street Tool and Curve Street Tool. This button act as Street Tools button on Toolbar.
- Line → Street: Convert existing line entities into streets.
- Redraw Streets: Force redraw the street shapes.
- Cleanup Streets: Optimize and tidy up street layouts.
For more detailed information about specific street tools and features, please refer to the following sections: Additional Street Tools
Additional Street Tools
Line to Street
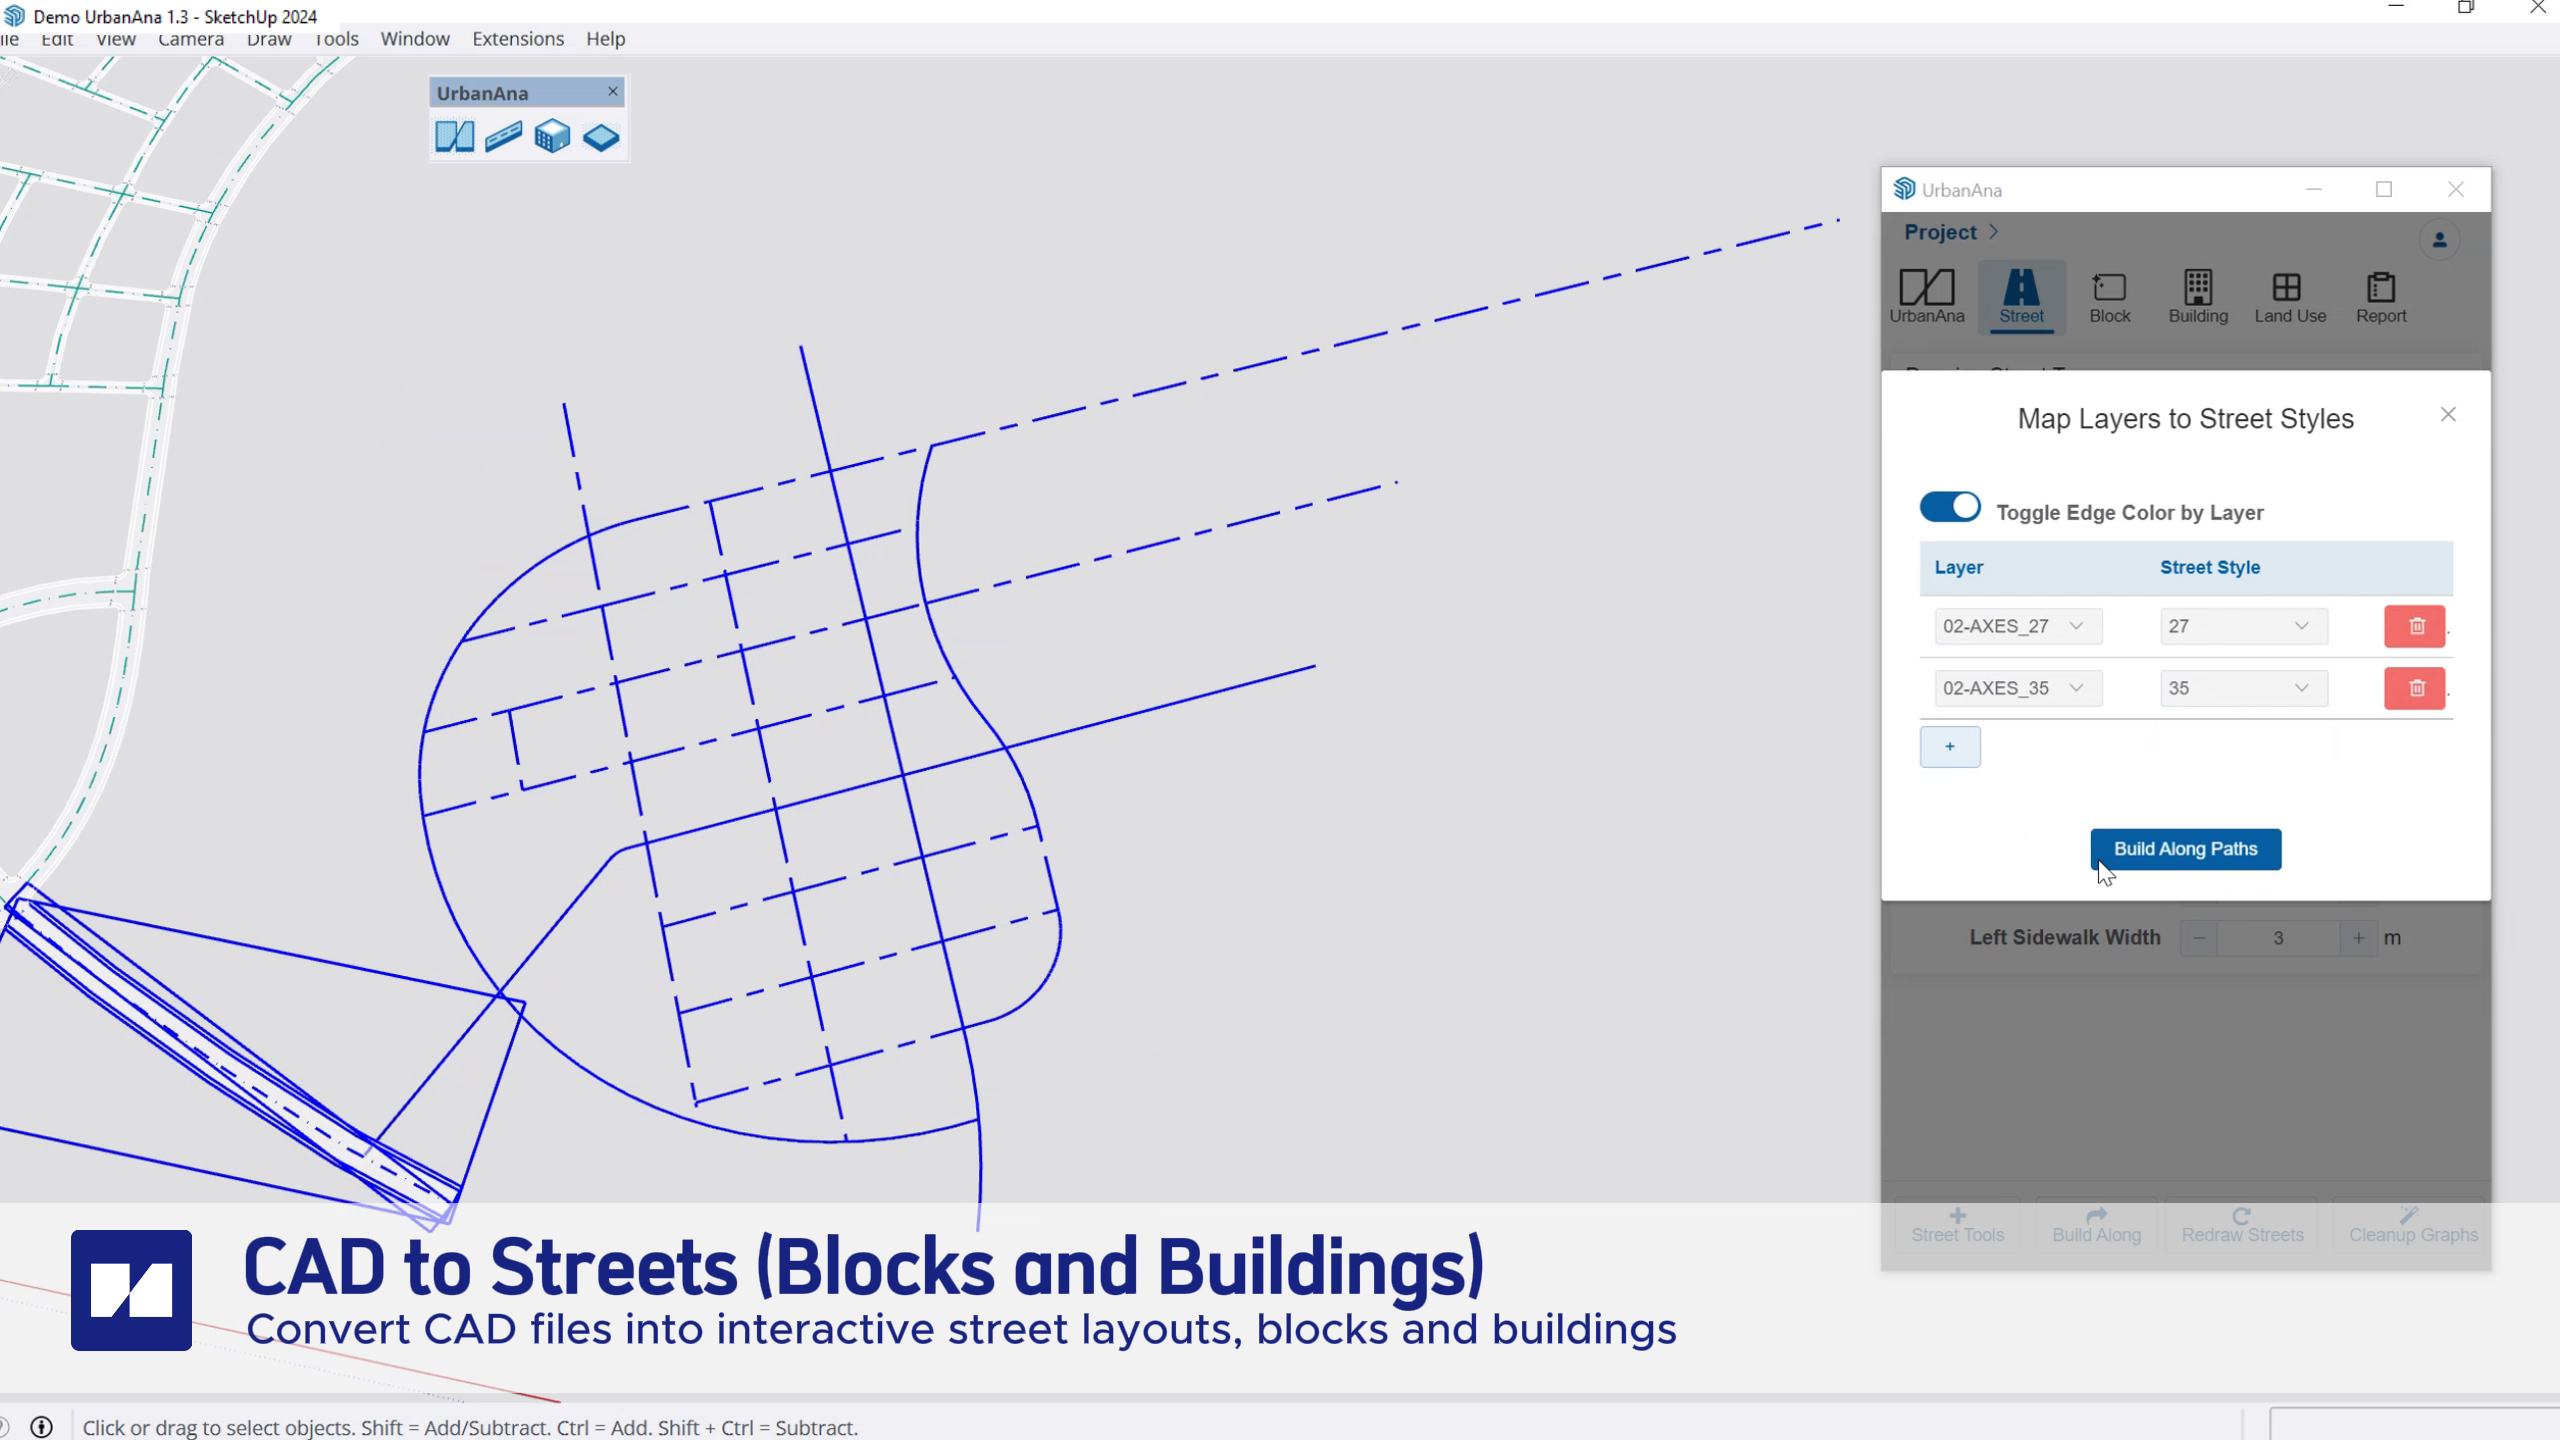
Tool interface for converting CAD lines into UrbanAna street objects
The Line to Street tool provides functionality to convert existing line entities (like imported CAD lines) into UrbanAna street objects. This tool is particularly useful when working with imported street layouts or existing urban plans.
Key features:
- Layer Mapping: Map SketchUp layers to specific street types. When a line exists on a mapped layer, it will automatically be converted to that corresponding street type.
- Default Street Type: Lines on unmapped layers will be converted using the currently selected Drawing street type.
- Visual Feedback: Toggle “Edge Color by Layer” option to visually distinguish different layers before conversion, making it easier to verify layer assignments.
- Batch Processing: Convert multiple lines simultaneously.
Steps to use:
- Click the “Line → Street” button in the toolbar to open the Map Layers to Street Types dialog.
- In the dialog, set up layer mappings by selecting layers from the dropdown menu (only layers containing selected entities will be shown, as a way to easier filter the layer).
- In the viewport, select the line entities you want to convert into streets.
- Click “Convert Line → Street” in the dialog to transform the selected lines into UrbanAna street objects with their assigned street types.
The converted streets will inherit all the properties and parameters of their assigned street types, including width, sidewalks, and curb settings.
Redraw Streets
The Redraw Streets tool forces a complete redraw of all street shapes in the viewport. To use this tool, simply click the “Redraw Streets” button in the Street Tools panel. The redraw process happens automatically and will update all streets in your model.
When activated, this tool will:
- Erase all existing street shapes from the viewport
- Generate fresh street shapes based on the current center lines and parameters
- Realign all street geometry with their defining center lines
This tool is particularly useful as a troubleshooting step if you notice:
- Street shapes that don’t match their center lines
- Visual artifacts in street geometry
- Inconsistencies in street appearance
Cleanup Streets
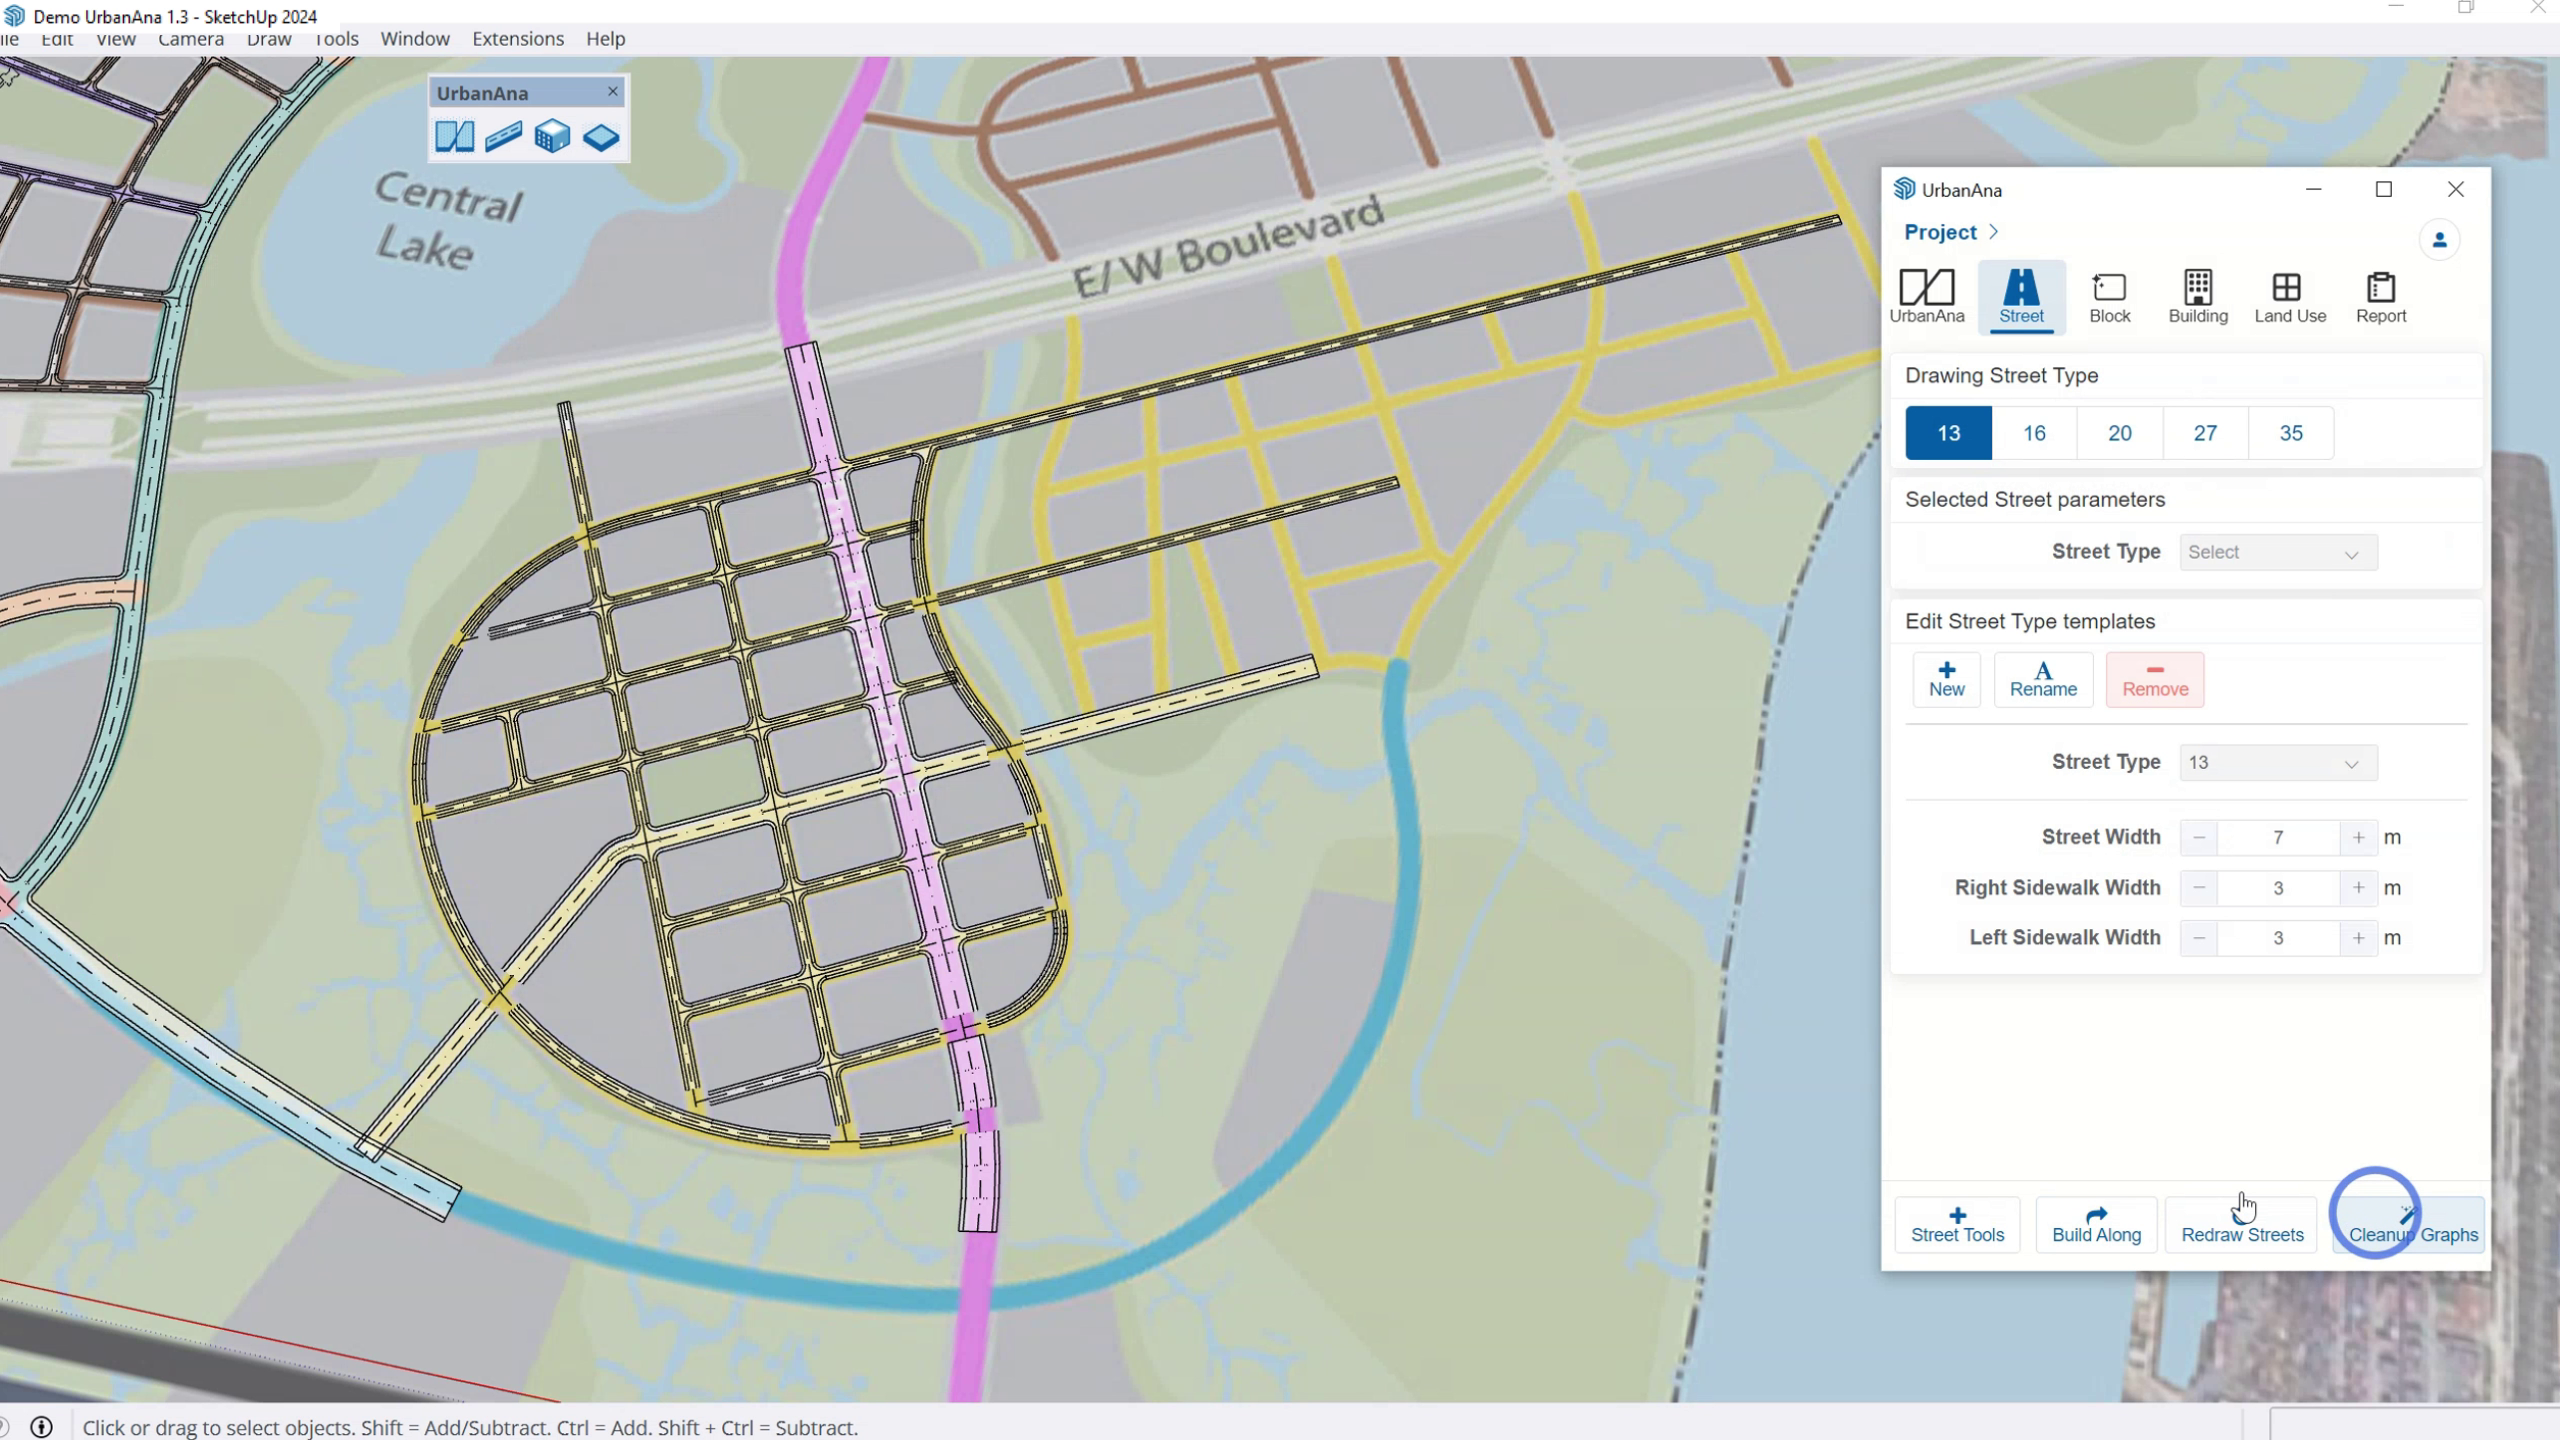
Cleanup Streets tool for street network optimization
The Cleanup Streets tool automatically optimizes and tidies up your street network by performing several cleanup operations:
- Node Snapping: Automatically snaps nearby street endpoints together when they are within a small threshold distance of each other. This helps create clean connections between streets that should meet but don’t quite touch.
- Node Merging: Combines multiple street endpoints that are at the same location into a single node. This eliminates redundant connection points and ensures proper street intersections.
- Segment Intersection: Automatically creates proper intersections where streets cross each other. This includes splitting streets at intersection points and ensuring proper connectivity.
For best results, you can run the Cleanup Streets tool multiple times, as each pass may reveal additional opportunities for optimization. To use this tool:
- Click the “Cleanup Streets” button in the Street Tools panel. You can either clean up all streets in the model, or first select specific streets to limit the cleanup process to just those streets.
- The tool will automatically analyze and clean up your entire street network
- Repeat if needed until no further improvements are made
This tool is especially useful after convert Lines to Streets to ensure your street network maintains proper topology and connectivity.