
Navigating the UrbanAna User Interface: A Complete Overview
Navigate UrbanAna's user interface with ease. Explore the toolbar, navigation bar, properties tabs, parameters panels, tools section, quick pin, and urban metrics report for efficient urban design.
Knowledge Base
Let’s explore the UrbanAna interface and learn how to navigate its features effectively.
Toolbar
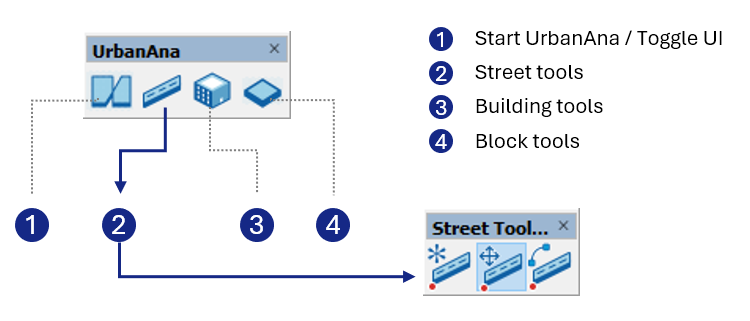
UrbanAna’s main toolbar with essential urban design tools
The toolbar consists of 4 buttons:
- Start UrbanAna, and toggle the UI
- Street tools
- Building tools
- Block tools
Tools button can open a secondary toolbar containing specific tools for that category. For example, clicking on Street tools will opens the Street Tools toolbar, which includes Draw Street Tool, Move Street Tool, and Curve Street Tool. (Figure 1)
User Interface
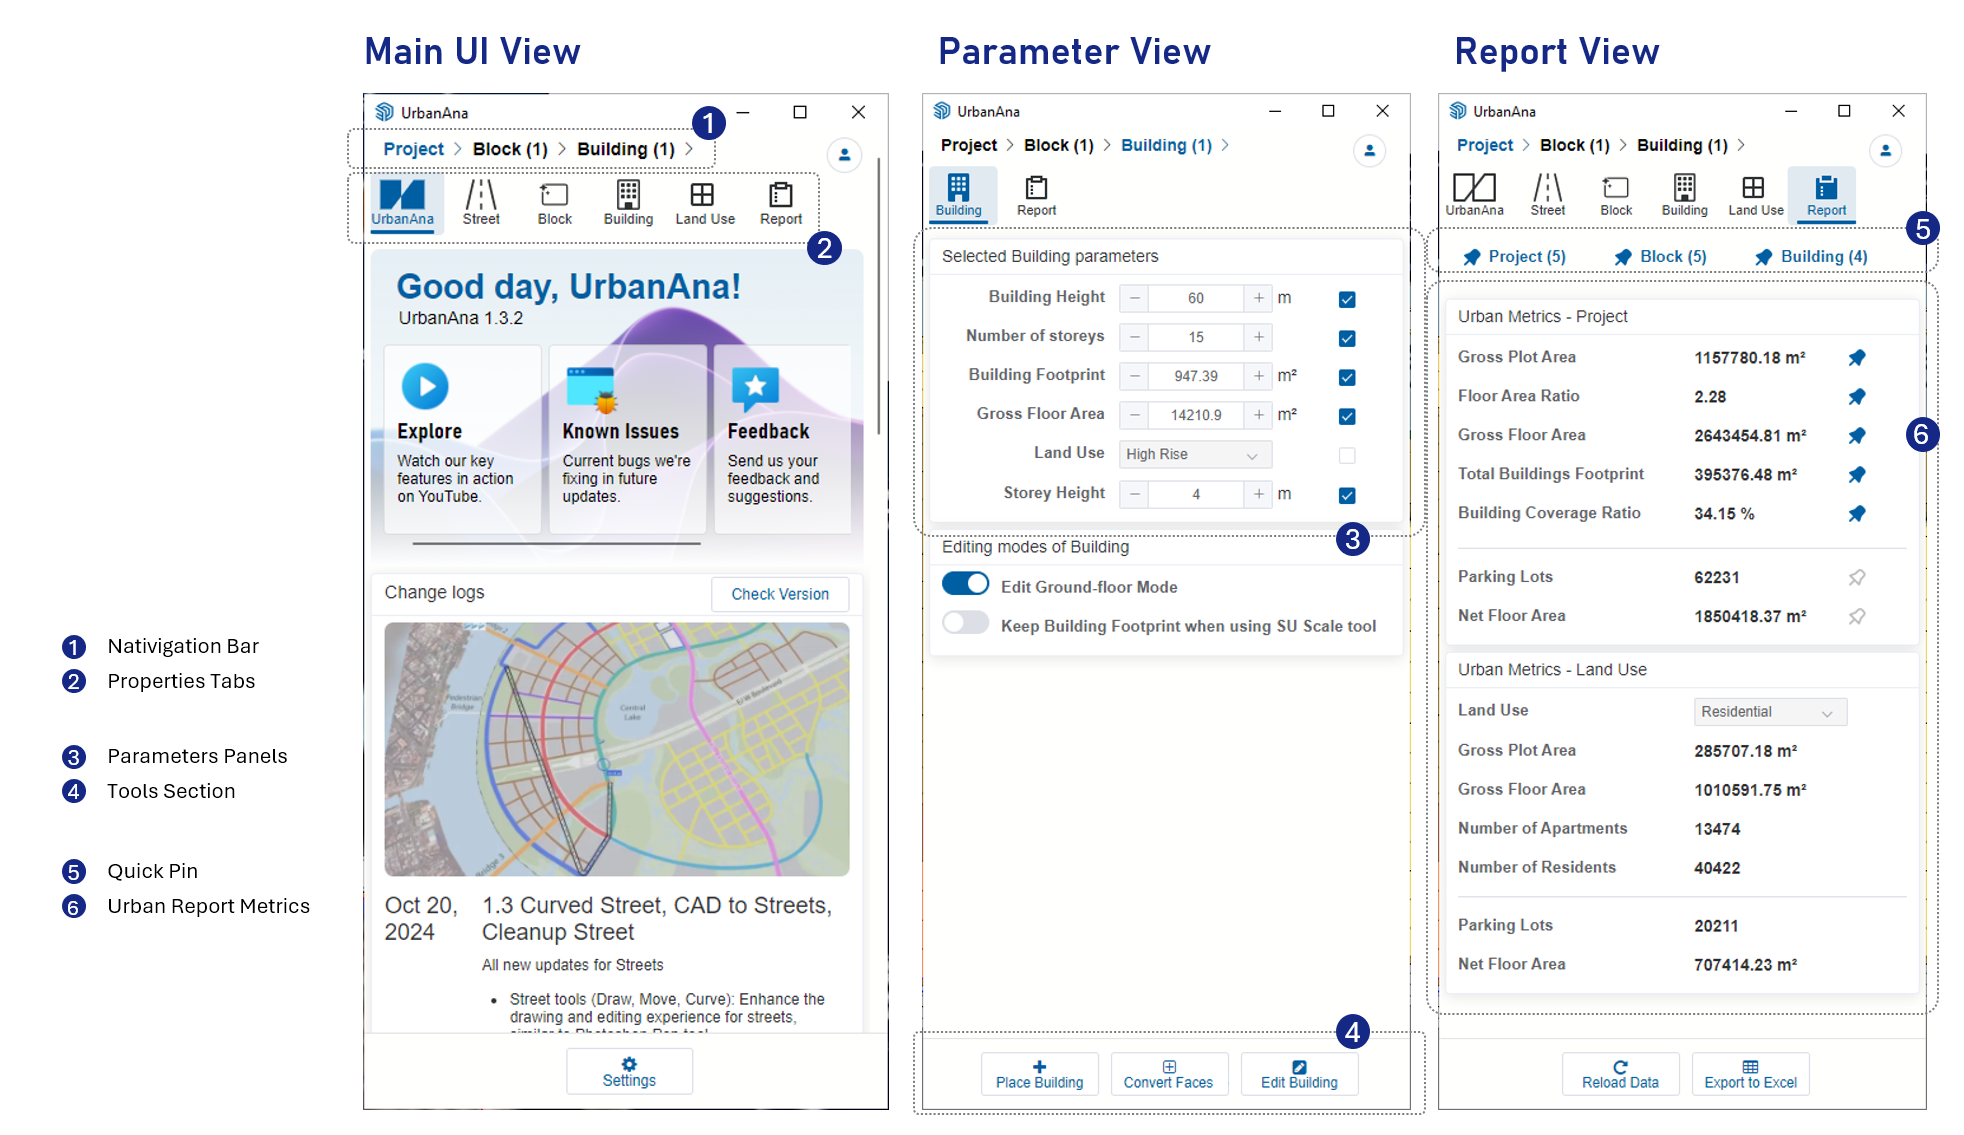
Complete overview of UrbanAna’s user interface for urban design
Nativigation Bar
(Figure 2 > 1) It interactively responds based on which object types are currently selected in the viewport and shows the hierarchy of the selected object. The default is Project, where you can set values for the whole project. For example, when selecting a building, it will show “Project > Block > Building” to indicate the building’s position in the hierarchy.
Properties Tabs
(Figure 2 > 2) The Properties tabs can be found just below the Navigation Bar and display the properties associated with different object types. At present, these tabs are organized under three main object types: Project, Block and Building
- Project > UrbanAna, Street, Block, Building, Land Use, Report
- Block > Block, Building, Report
- Building > Building, Report
You can find detailed information for each object type in their respective knowledge base pages.
Parameters Panels
(Figure 2 > 3) The Parameters Panels displays context-specific parameters, based on your currently selected object type. This section allows you to customize and adjust specific parameters for each object type such as building dimensions, land use,… to match project to the design requirements.
Tools section
(Figure 2 > 4) The Tools section displays additional tools based on the selected object type, extending the main toolbar’s functionality.
Quick Pin
(Figure 2 > 5) The Quick Pin section allows you to pin frequently used parameters to the viewport for real-time monitoring. You can quickly toggle pins for project, block, and building metrics, or manually pin individual parameters by clicking the pin icon next to them.
For more details, see 5.7 Report.
Report – Urban Metrics
(Figure 2 > 6) The Report tab provides real-time urban metrics at the Project, Land Use, Block and Building levels. Key metrics include:
- Gross Floor Area (GFA): Total floor area
- Floor Area Ratio (FAR): Floor area to site area ratio
- Building Coverage Ratio (BCR): Site coverage percentage
- Gross Plot Area: Total land area
- Required Parking Spaces: Based on land use
- Population Statistics: Primary Units (apartments, offices) and Secondary Units (residents, employees)
Reports update automatically and can be exported. For more details, see 5.7 Report.